
TL;DR
- Use a double seal design with appropriate materials like O-rings or adhesives
- Use cable overmolding and select connectors that are rated for the desired level of protection
- Consider adding ventilation to equalize pressure and prevent moisture buildup
- If glue is used, ensure surfaces are clean before application. Even better, sand them off
- Follow manufacturer recommendations for connector design and mating process
- Consider the assembly process and how it could impact the weakest points of the design
- Choose cables that are rated for the desired level of protection and keep in mind that cables may only reach the advertised IP rating when mated with another cable
Your earphones that pump rock music to boost your workout are necessarliy sweat-proof, and the “water resistance” capability of your smartphone is likely what made it stand out from other options.
But what do these nebulous terms mean? There are many different terms in the industry for what concerns waterproofing, and its often hard to distinguish between them.
IP rating introduction
As you read above, Ingress Protection (IP) is the main index for certifying how a device is protected against solids and liquids. This rating follows the standard IEC 60529.

Although ingress protection is the correct nomenclature, in most designs we’re simply interested in liquids protection. That’s why you want to focus on the second digit of the IP rating – the one in black/grey in the image above.
One of our clients asked us to design an enclosure that could withstand one of the most rigid levels of waterproofing, IP69K.
This level of protection is normally required by the automotive industry.
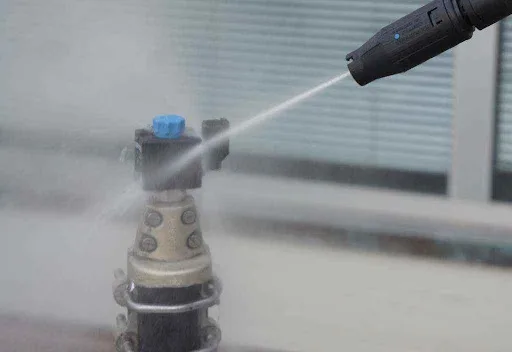
A vehicle is exposed to a range of harsh environments, from a dusty country road to the pressure washer. As such, the sensitive parts of a vehicle need to be properly protected – thus, the IP69K certification standard.
In order to be certified with this ambitious rating, your device must withstand the testing steps below:
A spray nozzle is fed with 80 °C (176 F) water at 80–100 bar and a flow rate of 14–16 L/min.
- The nozzle is held 10–15 cm from the device at angles of 0°, 30°, 60° and 90° for 30 seconds each.
- The test device sits on a turntable that rotates once every 12 seconds.
Designing the sealing housing
When pressure and/or high temperature are in play, the safest approach is to use a double seal design.
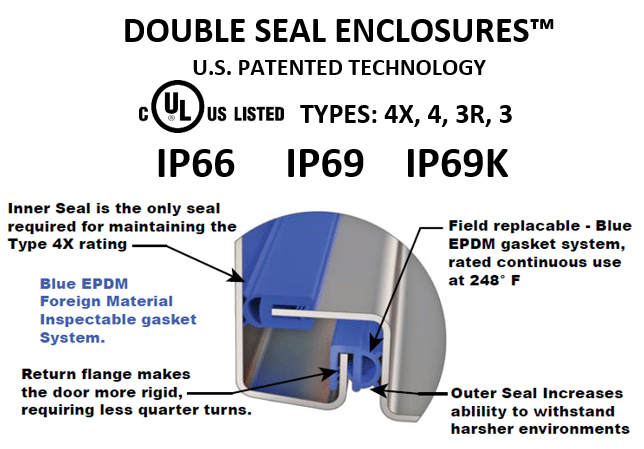
The outer seal should act as a first protection, reducing the pressure that will be seen by the inner seal.
Both seals, outer and inner, can be any of the following
- O-ring
- Gasket
- Glue
- Adhesive Tape
- A combination of the above
Materials drive the sealing selection.
If you opt for tapes or adhesives, they must adhere firmly to the enclosure surface. Make sure to select an appropriate seal based on the enclosure material (plastic, metal, composite).
Also, make sure to clean both surfaces prior to application, otherwise you won’t get full bonding strength. To increase glue adhesion even further, sand off the two surfaces with a fine grain sanding paper.
As an example, 3M offers some Very High Bonding tapes for plastic enclosures. Each option is tailored for a specific application.
If o-rings are your choice, the common ones in silicone should suffice for most use cases. Here is a more detailed article with a table comparing different o-ring materials.
Keep the electronics safe, and the EE team happy
IP69K, IP68 and other high protection ratings require airtight sealing.
Due to its nature, our enclosure won’t allow any exchange of air to the outside environment. As a result, we will see strong pressure variations inside the enclosure.
Also, the electronics located inside will produce heat during operation. This will condense the humidity present inside the enclosure, possibly causing shorts on the electronics themselves
These two factors will drastically shorten the lifespan of electronic parts inside the enclosure.
To avoid these issues, vents must be added on the enclosure, so that air can flow in and out. Pressure will then equalize between inside and outside the enclosure.
If you want to know more about vents, here are two interesting articles. Stay tuned for our own upcoming deep-dive on vents.
It’s fundamental to add a ventilation system to your design.
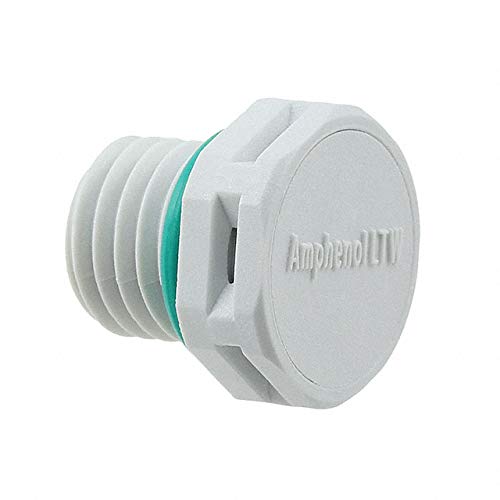
Amphenol LTW offers a good selection of vents specifically designed for this purpose.
Even though these vents are designed for this job, keep them away from any high pressure jet.
Place them on a side of the enclosure that is less exposed to the elements. If this is not possible, you should think about a more complex design to hide the vent.
Select the right connector
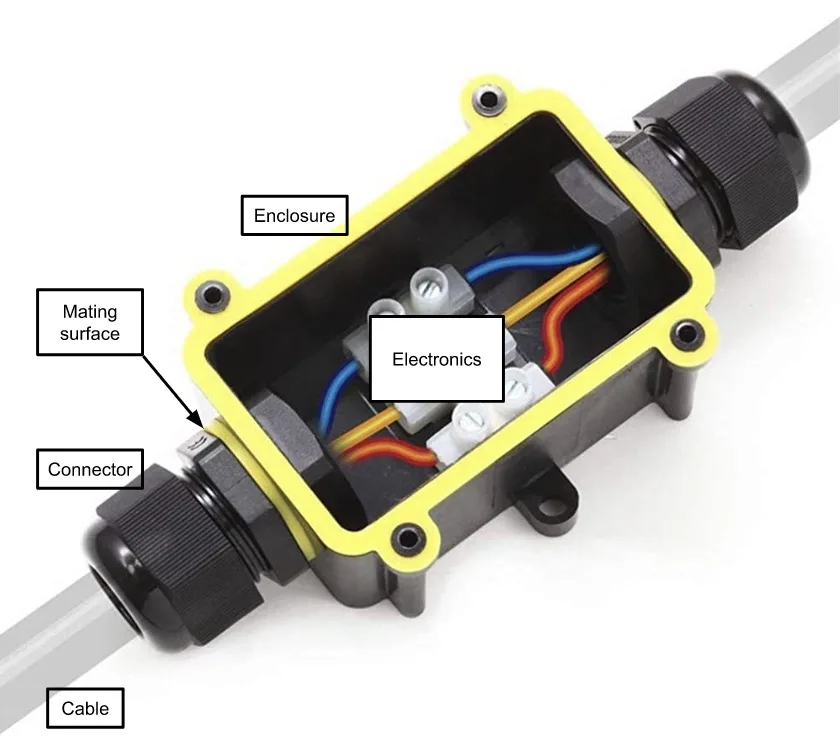
Your device will likely have to connect with another system. That connection point can be the weak link in the whole waterproof chain.
In the following example, the mating surface between enclosure and connector is the weakest point.
Cable overmolding is the most secure way to protect your device. A well designed enclosure along with a good overmolding process will not keep you awake at night.
There could be a case where you need to have your device disconnected for maintenance or other reasons. In this scenario your only option is a connector.
Amphenol Industrial offers some very good options for harsh environments, here’s an example.
The design should follow the connector’s manufacturer recommendations. As a general rule, the gap between connector and enclosure shall be as small and protected as possible.
Keep the assembly process in mind, and how it could impact this area.
There is something else to be concerned about. Cables that offer IP69K protection will only withstand that standard when they are mated with another cable. When the connector’s pins are exposed, most cables can only get up to IP67.